
Knife Skills Every Home Cook Should Know
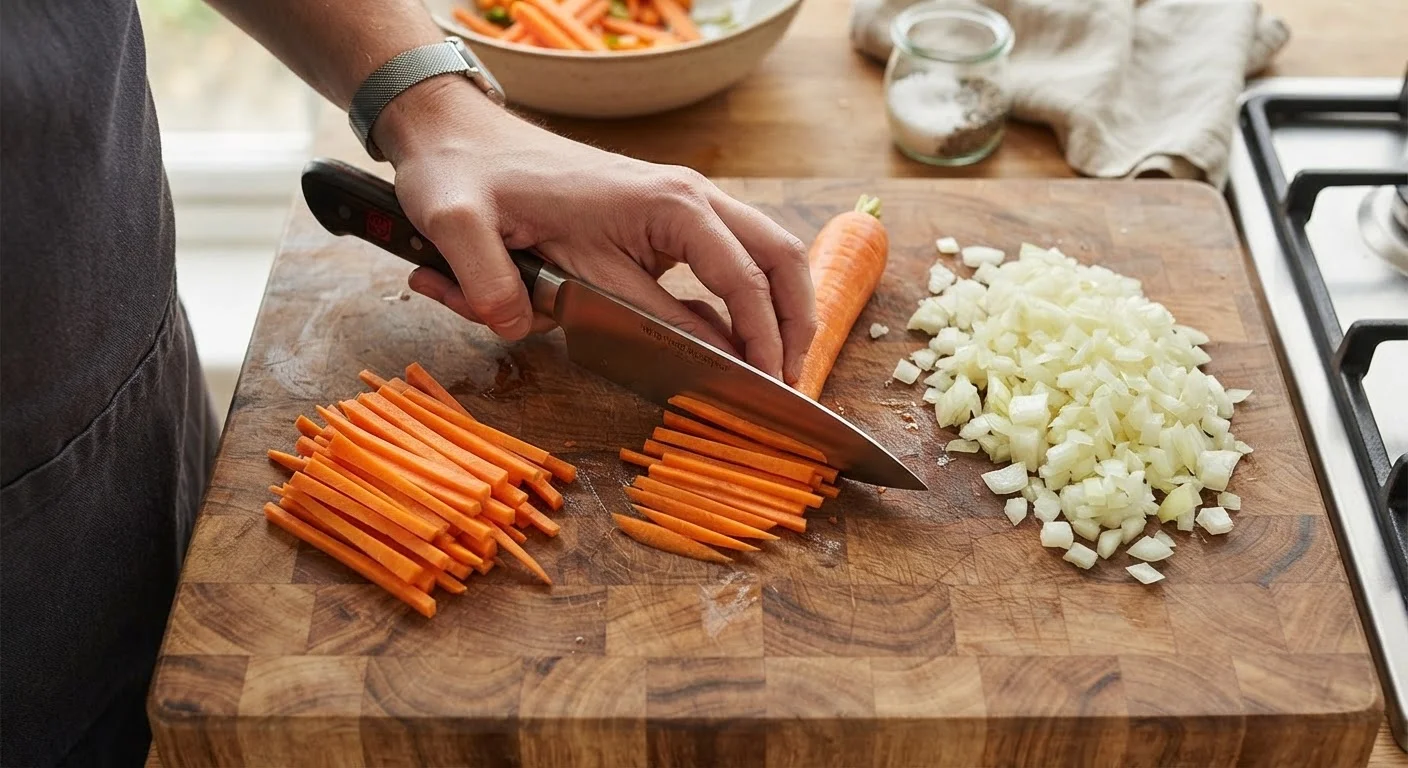
Photo credit: InfoHorizon.net | Access To Informative Content
In this article
From the rocking chop to the julienne cut, learn the fundamental knife techniques that make prep faster, safer, and more consistent.
Key Takeaways
- A pinch grip on the blade gives you more control and reduces hand fatigue.
- The claw grip protects your fingertips while guiding food safely under the blade.
- Mastering four cuts — chop, dice, julienne, and chiffonade — covers most recipes.
- A sharp knife is safer than a dull one because it requires less force.
- Good knife skills pair directly with organized prep habits like mise en place.
Why Knife Skills Matter More Than Any Gadget
No kitchen tool has a greater daily impact than a good knife wielded with confidence. Consistent cuts mean food cooks evenly — thin strips of carrot won't be half raw while thick chunks are done. Efficient prep reduces time at the cutting board, leaving you calmer and more in control before a single burner is lit.
Knife skills also integrate directly with organized cooking habits. When you can break down vegetables quickly and uniformly, the whole workflow improves. If you haven't already explored mise en place, pairing it with solid knife technique will transform how you approach any recipe.
Pinch grip
A knife-holding technique where the thumb and index finger pinch the blade just ahead of the handle, giving more control and precision than gripping the handle alone.
Claw grip
A hand position for the non-knife hand where fingertips curl inward and knuckles face the blade, acting as a guide and keeping fingertips safely away from the edge.
Julienne
A cut that produces thin, uniform matchstick-shaped pieces, typically about 1/8 inch thick and 2–3 inches long.
Chiffonade
A slicing technique for leafy herbs and greens that produces thin ribbons, created by rolling stacked leaves into a cylinder and slicing across it.
Honing
The process of realigning a knife blade's microscopic edge using a honing rod — it doesn't remove metal but keeps the edge working between sharpenings.
Bolster
The thick metal collar between the blade and handle on a forged knife, which adds weight and balance and acts as a natural finger guard.
How to Hold a Knife Correctly
Most beginners grip the handle like a hammer. The pinch grip is more effective: place your thumb and the side of your bent index finger directly on the blade, just ahead of the bolster, and wrap the remaining fingers around the handle. This gives you significantly more control over blade direction and reduces fatigue during longer prep sessions.
Your non-knife hand is equally important. Use the claw grip — curl your fingertips inward so your knuckles face the blade and act as a guide rail. The flat side of the blade rests lightly against your knuckles as you cut. This keeps your fingertips safely away from the edge at all times.
Practice on a Forgiving Vegetable
Onions, potatoes, and carrots are ideal for practicing grip and cutting technique — they're inexpensive, forgiving of mistakes, and appear in nearly every cuisine. Spend five minutes dicing an onion with intentional attention to your grip before your next meal prep and you'll notice improvement quickly.
The Core Cutting Techniques
Four cuts will take you through the vast majority of recipes:
- The rocking chop: Keep the tip of the knife on the board and rock the heel down through the food. Use this for herbs, garlic, and rough vegetable prep. It's fast and builds a natural rhythm.
- The dice: Make a series of parallel cuts, rotate the food 90 degrees, make parallel cuts again, then slice across to produce small cubes. For onions, leave the root end intact — it holds the layers together while you work.
- The julienne: Trim vegetables into uniform planks, stack the planks, then cut lengthwise into thin matchsticks. Aim for about 1/8-inch thickness for a classic julienne.
- The chiffonade: Stack leafy herbs or greens, roll them tightly into a cylinder, then slice across into thin ribbons. Ideal for basil, mint, or kale.
Once you're comfortable with these basics, you'll find that most new recipes simply combine them in different sequences. A solid grounding here also sets you up for more ambitious projects — like making pasta from scratch, where uniformity in prep carries over to cooking technique.
Safety Habits That Prevent Accidents
Most kitchen cuts happen for predictable reasons: a slippery cutting board, a wobbly vegetable, or a moment of distraction. Address them directly:
- Place a damp kitchen towel under your cutting board to prevent sliding.
- Cut a flat face on round vegetables — half a potato or onion sits stable; a whole one rocks.
- Never try to catch a falling knife. Step back and let it fall.
- Keep your knife off the edge of the counter when not in use.
Building good habits before you start cooking matters too. The kitchen prep checklist is a useful tool for ensuring your workspace is set up safely before you pick up a knife.
Never Leave a Knife in a Sink of Water
Submerging a knife in a sink — especially with soapy water that obscures the blade — is one of the most common causes of kitchen cuts. Always wash knives individually by hand, keeping the blade edge pointed away from you, and dry them immediately.
Keeping Your Knife Sharp and Ready
A dull knife is genuinely more dangerous than a sharp one. It slips off food surfaces instead of biting in, requiring extra force that makes cuts unpredictable. Two maintenance tools handle different jobs:
- Honing rod
- Realigns the blade edge without removing metal. Use it every few cooking sessions by drawing the blade down the rod at a consistent 15–20 degree angle.
- Whetstone or pull-through sharpener
- Removes a small amount of metal to restore a dull edge. Most home cooks need to sharpen only a few times per year.
After washing, dry your knife immediately rather than leaving it to air dry or soaking it in the sink — both accelerate edge wear and can damage wooden handles. Store knives on a magnetic strip or in a knife block, not loose in a drawer where blades knock against each other.
A well-organized kitchen makes maintenance easier too. If counter space is a challenge, smart small-kitchen organization can help you find a logical home for your knife storage.
Frequently Asked Questions

Author
Food Editorial Team
Food Editorial Team is the collective byline for our editorial team and contributor network. Articles published under this byline or an editorial pen name are researched, written, and reviewed according to our editorial standards for clarity, consistency, and independence before publication.
View all articles →