
Composting at Home: A Complete Starter's Roadmap
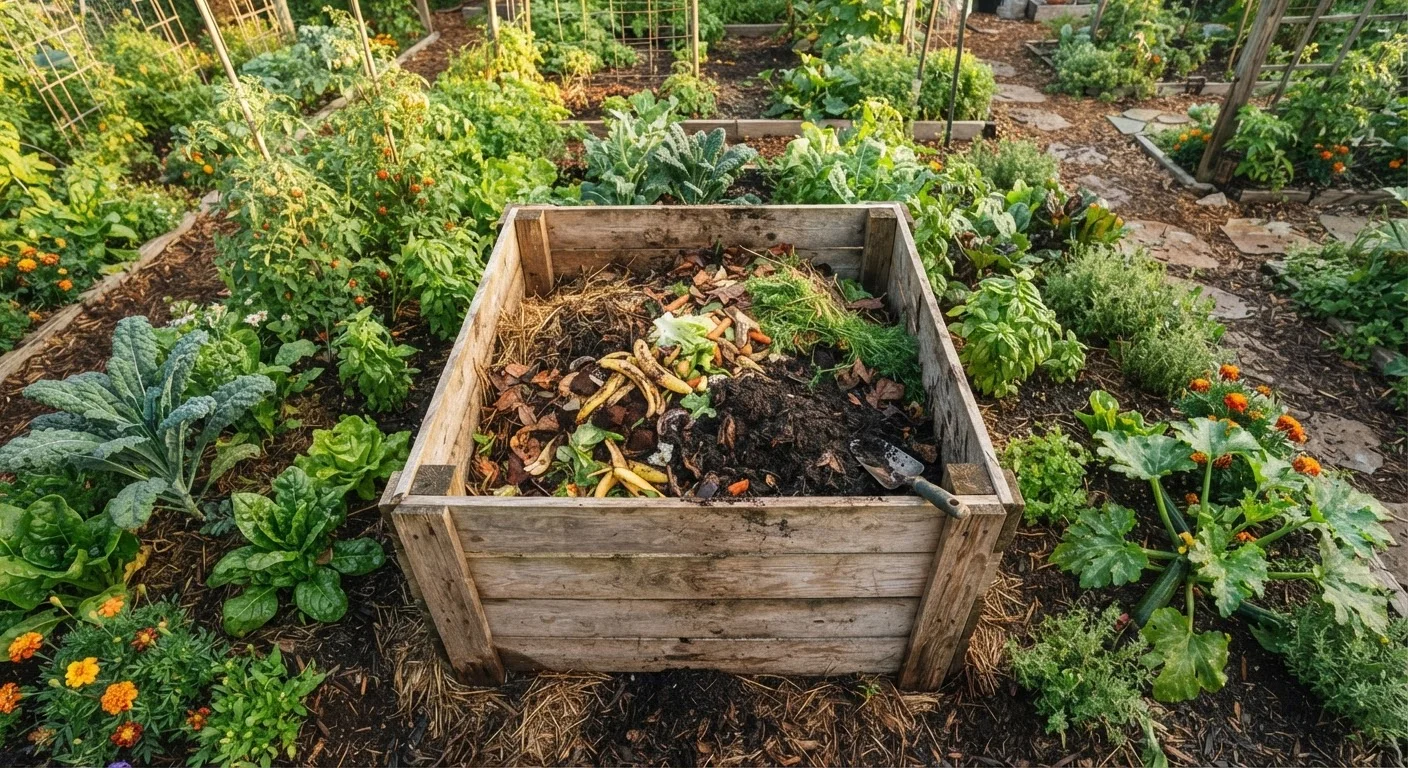
Photo credit: InfoHorizon.net | Access To Informative Content
In this article
New to composting? This guide covers what to add, what to avoid, how to manage moisture, and how to turn kitchen scraps into garden gold.
Key Takeaways
- Compost improves soil structure, feeds beneficial microbes, and reduces the need for synthetic fertilizers.
- A healthy compost pile needs a roughly 2:1 ratio of brown (carbon) to green (nitrogen) materials.
- Most kitchen scraps and yard waste can be composted; meat, dairy, and oily foods should stay out.
- Finished compost smells earthy, looks dark and crumbly, and is ready in roughly two to six months.
- Compost can be used as a soil amendment, top dressing, or mixed into potting mix for containers.
What Composting Actually Does for Your Garden
Composting is the process of allowing organic materials to break down into a dark, crumbly substance called humus. When added to garden soil, finished compost improves drainage in clay-heavy soils, helps sandy soils retain moisture, and feeds the microbes and earthworms that make nutrients available to plant roots.
Unlike synthetic fertilizers, compost releases nutrients slowly and steadily, reducing the risk of over-fertilizing. It also helps buffer soil pH over time, creating more hospitable growing conditions for a wide range of plants. Pair compost with a good mulching strategy and your soil health compounds season after season.
Humus
The dark, stable organic matter left after decomposition is complete. It improves soil structure and provides a slow-release source of nutrients for plants.
Greens
Nitrogen-rich compost materials such as fruit scraps, vegetable peels, and fresh grass clippings. They provide the fuel microbes need to break down organic matter.
Browns
Carbon-rich compost materials such as dried leaves, cardboard, and straw. They balance greens and provide the structure that keeps a pile from getting soggy.
Vermicomposting
A composting method that uses worms — usually red wigglers — to break down food scraps into nutrient-rich castings. It works well indoors and in small spaces.
Carbon-to-nitrogen ratio
The balance between brown (carbon) and green (nitrogen) materials in your compost pile. A roughly 2:1 brown-to-green ratio by volume keeps decomposition active and odor-free.
Bokashi
A fermentation-based method of pre-treating food scraps using beneficial microbes. It handles materials like meat and dairy that traditional composting cannot, and it works in a sealed bucket indoors.
Choosing Your Composting Method
Your space and lifestyle will determine which method fits best. Here are the three most common options for home gardeners:
- Open pile or bin: The simplest approach — pile materials in a corner or enclosed bin. Low effort, but slower decomposition. Best for large yards with room to spare.
- Tumbler: A sealed rotating drum that speeds decomposition through easy turning and heat retention. Good for smaller yards and those who want faster results with less mess.
- Vermicomposting (worm bin): Uses red wiggler worms to break down kitchen scraps. Compact enough for a balcony or garage. Produces extremely nutrient-dense castings.
If you're just getting started, a simple open bin made from four wooden pallets or a purchased plastic bin is a practical, low-cost entry point. You can always scale up later.
Start Small and Simple
You don't need a perfect setup to begin composting. A basic pile in the corner of your yard or a $20 plastic bin works just as well as elaborate systems. Once you've built the habit of saving scraps and layering materials, you can refine your setup over time.
What to Add — and What to Keep Out
A successful pile depends on the right mix of materials. Think in two categories:
- Greens (nitrogen-rich)
- Fruit and vegetable scraps, coffee grounds and paper filters, tea bags (remove staples), fresh grass clippings, and plant trimmings.
- Browns (carbon-rich)
- Dried leaves, cardboard torn into small pieces, newspaper, straw, paper bags, and wood chips.
Aim for roughly two parts brown to one part green by volume. Too many greens and the pile gets slimy and smells; too many browns and decomposition slows to a crawl.
Keep these out of your pile: meat, fish, bones, dairy products, oily or greasy foods, pet waste, diseased plants, and anything treated with pesticides. These materials attract pests or introduce pathogens that a home pile may not adequately break down.
When you're prepping vegetables in the kitchen, saving scraps is easy — keep a small lidded container on the counter. See our kitchen prep checklist for tips on efficient prep that also minimizes waste.
Avoid These Common Problem Additions
Adding meat, dairy, or cooked oily foods to a backyard pile attracts rodents and other pests quickly. Pet waste — including cat litter — can carry pathogens and should never go in a home compost pile used on food gardens. When in doubt, leave it out and stick to raw plant-based scraps.
Managing Moisture, Airflow, and Balance
Three factors drive decomposition: moisture, oxygen, and the carbon-to-nitrogen ratio. Getting all three right keeps your pile active and odor-free.
- Moisture: Your pile should feel like a wrung-out sponge — damp but not dripping. In dry weather, water it lightly. If it's too wet, add dry browns and turn it.
- Airflow: Microbes need oxygen to work efficiently. Turn the pile with a pitchfork every one to two weeks, or more often if you want faster results. A pile that never gets turned will still compost — just slowly.
- Balance: If decomposition seems stalled, add more greens. If the pile smells like ammonia, add more browns. Small adjustments usually fix common problems quickly.
Temperature is a useful indicator: an active pile in the center will feel noticeably warm — sometimes hot. That heat is sign that microbes are at work and helps break down weed seeds and pathogens.
Knowing When Your Compost Is Ready
Finished compost no longer looks like the materials you put in. It should be dark brown to black, have a loose, crumbly texture, and smell earthy — like a forest floor after rain. You should not be able to identify individual food scraps or leaves.
If you can still see chunks of original material, the compost isn't done. Move unfinished material back to the pile and let it continue breaking down. Using partially finished compost in a garden bed can temporarily tie up nitrogen in the soil as it continues decomposing, which can compete with plant roots.
Depending on your method and climate, expect finished compost in two to six months for a hot, well-managed pile, or up to a year for a passive one.
Putting Finished Compost to Work
Once your compost is ready, there are several effective ways to use it:
- Soil amendment: Work two to three inches of compost into the top six to eight inches of a new garden bed before planting.
- Top dressing: Spread a half-inch layer around existing plants in spring or fall to slowly feed the soil without digging.
- Potting mix booster: Blend finished compost into container potting mix at roughly a one-to-four ratio to improve moisture retention and add nutrients.
- Lawn dressing: Spread a thin layer over grass in early fall and rake it in to improve soil health underneath.
Compost is especially valuable in a vegetable garden, where you're asking a lot from the soil each season. Learn more about setting up a productive growing space in our guide on starting a vegetable garden in a small backyard. Building a compost habit is one of the simplest ways to grow a healthier, more resilient yard over time — with less reliance on store-bought inputs.
Compost Enriches Soil Over Time
A single application of compost provides immediate benefits, but consistent annual additions build soil health progressively. Over several seasons, regularly amended beds develop better structure, drainage, and biological activity — reducing how much additional fertilizing or watering your garden needs.
Frequently Asked Questions

Author
Home & Garden Editorial Team
Home & Garden Editorial Team is the collective byline for our editorial team and contributor network. Articles published under this byline or an editorial pen name are researched, written, and reviewed according to our editorial standards for clarity, consistency, and independence before publication.
View all articles →