
Fluid Levels Every Driver Should Know How to Check
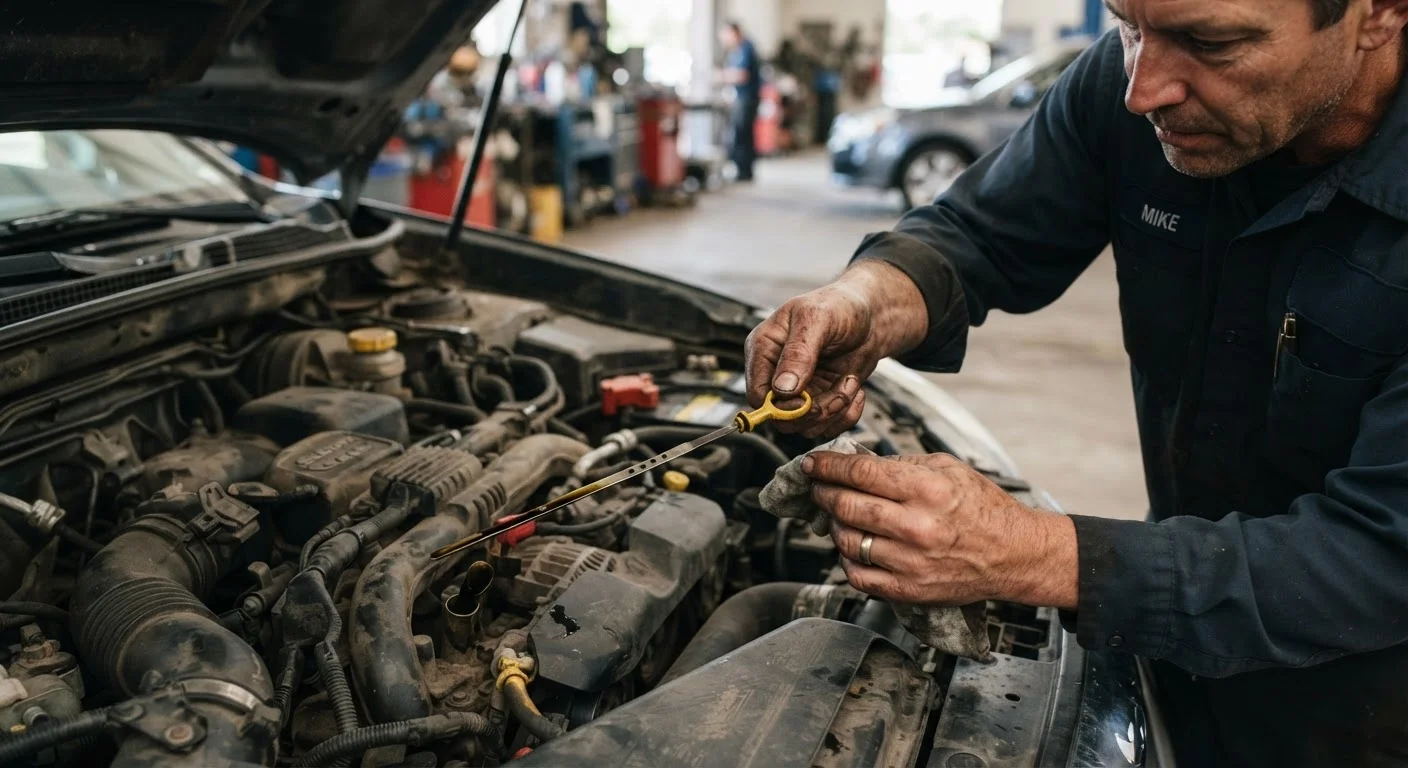
Photo credit: InfoHorizon.net | Access To Informative Content
In this article
Engine oil, coolant, brake fluid, and more — a step-by-step walkthrough for checking the fluids that keep your car running safely.
Key Takeaways
- Six key fluids - engine oil, coolant, brake fluid, transmission fluid, power steering fluid, and windshield washer fluid - require regular checks.
- Most fluid checks take under 20 minutes and require no special tools beyond a clean rag.
- Always check fluids on a level surface with the engine cool unless the owner's manual specifies otherwise.
- Low or discolored fluid can signal a leak or mechanical issue that warrants professional inspection.
- Your owner's manual is the definitive guide for fluid types, capacities, and service intervals.
Why Fluid Checks Matter for Every Driver
Your car depends on a network of fluids to keep its systems lubricated, cooled, pressurized, and clean. When any one of them runs low or degrades, performance suffers - and in some cases, safety does too. The good news is that checking these fluids is genuinely simple, requires no mechanical background, and costs nothing but a few minutes of your time.
This guide is built for drivers at any experience level. Whether you're a first-time car owner - in which case our guide for new drivers is a great companion read - or someone who's simply never had fluid checks explained clearly, these steps will give you the confidence to stay on top of this essential habit.
What you will need
What You'll Need Before You Start
No specialty tools are required for a basic fluid check. The items below cover everything from locating components in your engine bay to safely topping off when needed.
Owner's Manual
Identifies the correct fluid specifications, dipstick locations, and service intervals for your specific vehicle.
Clean Rag or Paper Towels
Used to wipe dipsticks clean before taking a reading and to clean up any drips.
Flashlight
Illuminates hard-to-see reservoir markings and dipstick graduations in a crowded engine bay.
Nitrile Gloves
Protects hands from engine oil, coolant, and brake fluid, some of which are skin irritants.
Funnel
Prevents spills when adding fluid to narrow reservoir openings.
Once you have these on hand, fluid checks become a quick, low-effort routine rather than a source of uncertainty. For a broader look at what belongs in a regular maintenance rhythm, see the annual car maintenance audit.
Step-by-Step: Checking All Six Fluids
Work through each fluid in the order below. The whole process typically takes 10-20 minutes from hood pop to close.
Prepare the Vehicle
Park on a level surface and turn off the engine. For most fluid checks, the engine should be cold or have cooled for at least 10-15 minutes. A level surface ensures accurate dipstick and reservoir readings. Gather your rag, flashlight, and owner's manual before opening the hood.
Check the Engine Oil
Locate the oil dipstick - typically marked with a bright yellow or orange handle. Pull it out, wipe it clean with your rag, reinsert it fully, then pull it out again. The oil level should fall between the two marks at the bottom of the dipstick. Also note the oil's color: healthy oil ranges from amber to light brown. Black, gritty, or milky oil warrants attention from a mechanic.
Check the Coolant (Antifreeze)
Find the coolant reservoir - a translucent plastic tank usually labeled with a temperature symbol. With the engine cold, check that the fluid level sits between the MIN and MAX lines on the side of the tank. Coolant is typically green, orange, or pink depending on the formulation. Do not mix coolant types without consulting your owner's manual.
Check the Brake Fluid
The brake fluid reservoir is typically a small, translucent plastic container on top of the master cylinder near the back of the engine bay on the driver's side. Without removing the cap, check whether the fluid level is between MIN and MAX. Brake fluid should be nearly clear to light yellow; dark brown fluid suggests it has absorbed moisture and may need to be flushed by a professional.
Check the Transmission Fluid
Many automatic transmissions have a dipstick similar to the oil dipstick - consult your owner's manual to locate it, as placement varies widely. Some modern vehicles have a sealed transmission with no serviceable dipstick; if that's the case, transmission fluid is typically checked by a technician. For vehicles with a dipstick, the process mirrors the engine oil check: wipe, reinsert, read. Healthy transmission fluid is translucent red or pink; dark brown or burnt-smelling fluid needs professional attention.
Check Power Steering Fluid
Vehicles with hydraulic power steering have a reservoir marked with a steering wheel icon. Many reservoirs are translucent, allowing a visual check without opening them. The level should fall within the marked range. Note that many newer vehicles use electric power steering and have no fluid reservoir - your owner's manual will confirm which system your car uses.
Check Windshield Washer Fluid
The windshield washer fluid reservoir is usually a blue-capped container. Unlike the other fluids on this list, washer fluid has no dipstick - fill it to near the top. Use a dedicated washer fluid solution rather than plain water, which can freeze in cold climates and promote bacterial growth in warm ones.
Never Open a Hot Radiator Cap
Coolant systems are pressurized. Opening the radiator cap or coolant reservoir cap while the engine is hot can cause scalding fluid to eject forcefully. Always wait at least 30 minutes after shutting off the engine before opening any cooling system component. If in doubt, consult a qualified mechanic.
Low Brake Fluid May Indicate a Problem
A noticeably low brake fluid level is not always just a sign of normal consumption - it can indicate a leak in the brake system or worn brake pads transferring fluid into the calipers. If the level is significantly low or drops repeatedly, have the system inspected by a qualified mechanic before driving.
Reading the Results and Knowing When to Act
Most of the time, a fluid check will simply confirm everything is fine - and that peace of mind is exactly the point. But occasionally you'll find a level that's low, a color that's off, or a consistency that doesn't look right. Here's how to interpret what you find:
- Slightly low: Top off with the correct fluid type specified in your owner's manual. Never substitute a different grade or formulation.
- Persistently low: A fluid that keeps dropping between checks suggests a leak. Have a mechanic identify the source.
- Discolored or contaminated: Dark, milky, or gritty fluid usually means it's overdue for a change - or something has gone wrong mechanically. Professional inspection is warranted.
Fluid checks pair naturally with other pre-drive awareness. Before any long trip, the pre-trip safety checklist provides a complete rundown of what to verify before you hit the highway.
Build a Quick Monthly Fluid Habit
Pick one consistent time each month - such as the first fill-up of the month - to run through all six fluid checks. It takes less time than pumping gas and catches problems early. Pair it with your annual maintenance checklist for complete coverage.
Finally, don't let myths about fluid service intervals lead you astray. Some common assumptions - like when fluids actually need changing - are addressed in our piece on car maintenance myths. Understanding the facts helps you avoid both neglecting your car and spending unnecessarily on premature services.

Author
Cars Editorial Team
Cars Editorial Team is the collective byline for our editorial team and contributor network. Articles published under this byline or an editorial pen name are researched, written, and reviewed according to our editorial standards for clarity, consistency, and independence before publication.
View all articles →