
Garage Organization: Turning a Catch-All Space Into One That Works
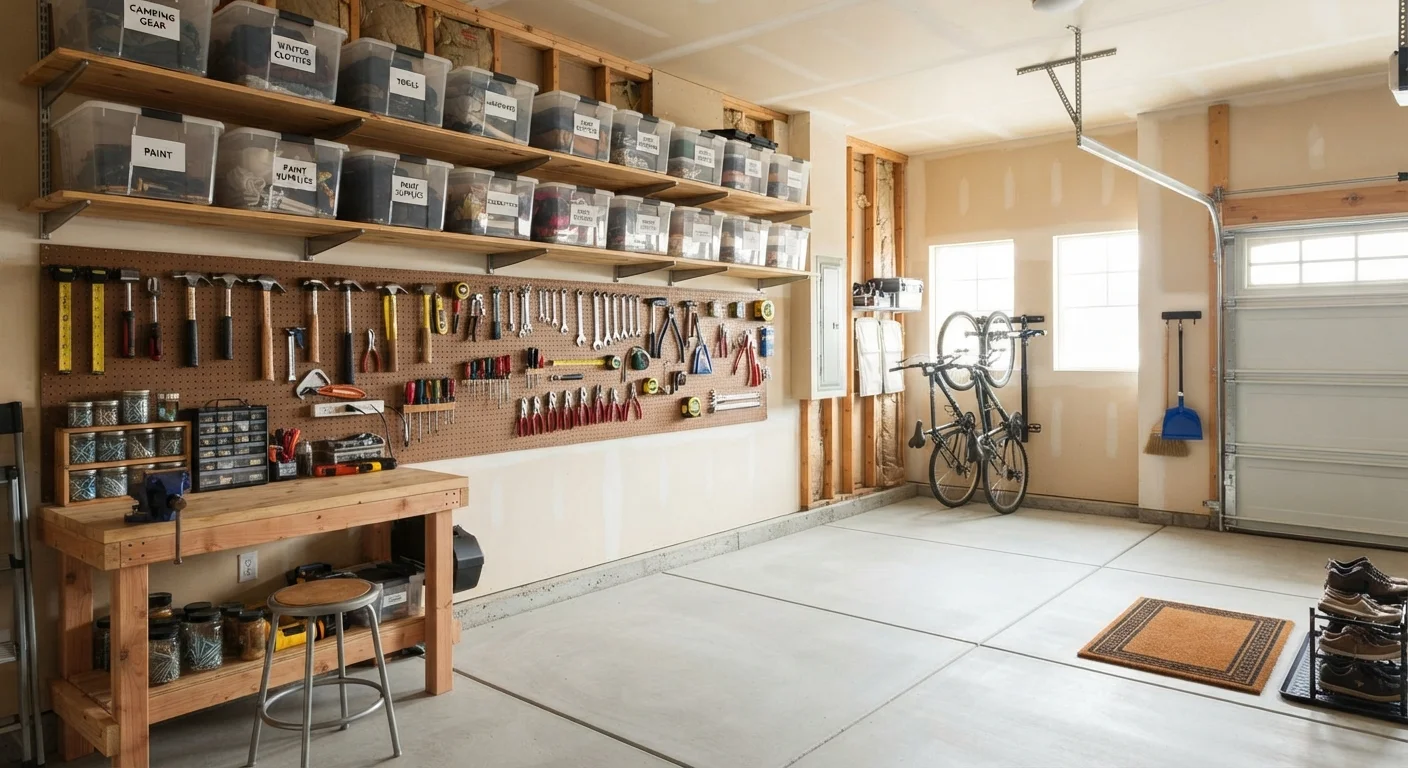
Photo credit: InfoHorizon.net | Access To Informative Content
In this article
The garage is often the last room to get organized and the first to fall apart. These practical strategies help reclaim floor space and keep order long-term.
Key Takeaways
- Start by emptying and sorting everything before committing to any storage system.
- Zones based on activity — not item type — create habits that stick long-term.
- Vertical wall space is almost always underused and offers the highest storage return.
- Keeping the floor as clear as possible makes the garage safer and easier to clean.
- Maintenance is as important as the initial setup — build a simple reset routine.
Why Garages Become Overwhelmed — and Why Standard Fixes Don't Hold
The garage is unique among home spaces: it's accessible, temperature-tolerant, and has no clear social function that enforces tidiness. Unlike a kitchen or bedroom, no one entertains in a garage. The result is that it absorbs whatever doesn't fit anywhere else — sports equipment, excess furniture, holiday decorations, DIY supplies — until it can barely fit a car.
Most attempts at garage organization fail for the same reason: people buy storage before they've sorted, leading to well-organized bins full of things that shouldn't be kept at all. Or they reorganize without zoning, so items land wherever there's room rather than where they'll logically be retrieved.
Functional garage organization requires two things that many organization approaches skip: a genuine decision-making pass before storage is purchased, and a spatial layout based on how the garage is actually used. The steps below walk through both.
What you will need
Tools and Materials You'll Need
The right tools make mounting and organizing significantly safer and faster. Measure your wall and ceiling dimensions before purchasing shelving to avoid costly sizing mistakes.
Measuring tape
Measure wall sections, floor space, and ceiling height before purchasing any shelving or overhead storage.
Stud finder
Locate wall studs to safely anchor heavy shelves, pegboard panels, or bike hooks.
Drill and bits
Mount wall brackets, pegboard, and overhead storage hardware securely.
Pegboard and hooks
Create a flexible, customizable hanging system for hand tools and garden implements.
Heavy-duty shelving units
Provide stable, tiered storage for bins, equipment, and seasonal items along walls.
Stackable labeled bins
Contain loose items by category and keep shelves tidy and readable.
Overhead ceiling storage rack
Utilize dead ceiling space above the car for bulky seasonal or rarely used items.
Store Hazardous Materials Safely
Paints, solvents, pesticides, and fuels must be stored in approved containers, away from heat sources, and out of reach of children. Check your local municipality's guidelines for disposal of expired or unwanted hazardous materials — many areas offer periodic collection events. Never store gasoline-powered equipment with fuel inside near an open flame or in a poorly ventilated space.
Step-by-Step: Transforming Your Garage
Follow these steps in order — particularly the sorting and zoning phases — before installing any permanent storage hardware. Skipping ahead to shelving installation without clearing and mapping first is the most common reason garage projects have to be redone.
Empty the Garage Completely
Pull everything out onto the driveway. This sounds extreme, but it's the only way to accurately see what you have and how much floor space actually exists. Working section by section almost always results in overlooked clutter staying put.
Sort Into Categories and Decide What Stays
Group everything into piles: keep, donate, trash, and relocate (items that belong inside the house). Be honest — garages become catch-alls partly because it's easier to defer decisions than make them. Anything broken, expired, or unused for more than two years deserves a hard look.
Map Out Activity Zones Before Moving Anything Back In
Divide the garage into functional zones based on how you actually use the space: automotive tools and car supplies near the garage door; lawn and garden equipment near an exterior side door; sports gear grouped by season; workshop tools in one dedicated area. Zones built around activity — not just item type — are easier for the whole household to maintain.
Maximize Vertical Wall Space
Install wall-mounted shelving and pegboard to lift storage off the floor. Walls are the garage's most underused asset. Reserve lower shelves for heavy, frequently accessed items; move lighter or seasonal bins higher. A pegboard panel is ideal for hand tools, extension cords, and garden implements — everything stays visible and within reach. For a deeper look at how vertical systems compare to other approaches, see our guide on vertical storage vs. drawer organizers.
Use Ceiling Space for Seasonal or Bulky Items
Overhead ceiling racks — mounted securely to ceiling joists — are well-suited for holiday decorations, camping gear, and other items accessed only a few times per year. Confirm the rack's weight rating matches your intended load before installing. Keep pathways below clear at all times for safety.
Return Items to Their Zones and Label Everything
Move your sorted, kept items back into the garage, placing each category within its designated zone. Use bins, hooks, and shelving to contain loose items. Label shelf sections and bin fronts — this is especially important in shared households where everyone needs to be able to find and return things independently.
Build a Simple Maintenance Routine
A well-organized garage will drift back toward chaos without a light reset habit. A ten-minute monthly sweep — returning displaced items, breaking down cardboard, and checking that zones are intact — prevents the slow accumulation that leads to another full overhaul. Add it to your room-by-room home organization checklist so it doesn't get skipped.
Label Everything at Eye Level
Adhesive labels on bin fronts and shelf edges make it easy for every household member to find items and — just as importantly — return them. Clear bins paired with labels eliminate the guesswork that causes clutter to drift back in. Consistent labeling is especially helpful if you're organizing a shared home; see our guide on organizing spaces with multiple people for additional strategies.
Keeping the Floor Clear: The Single Most Useful Habit
Floor clutter is the fastest way a garage becomes unusable. Items placed on the floor — even temporarily — tend to stay there. A simple rule: nothing lives on the garage floor except vehicles, freestanding equipment (lawn mowers, shop vacuums), and floor mats. Everything else belongs on a shelf, hook, or in a bin.
This habit also has a practical safety benefit. Clear floors reduce tripping hazards, make it easier to spot spills or leaks from vehicles, and ensure pathways to exits remain unobstructed.
Check Before Mounting Heavy Wall Storage
Before installing wall-mounted shelving, pegboard, or overhead racks, locate wall studs and confirm your garage walls can support the intended load. Improperly anchored heavy storage can pull free and cause injury or property damage. If you're unsure about your wall construction or load capacity, consult a licensed contractor before proceeding.
If your garage also connects to outdoor storage or garden areas, our Garden & Outdoors hub has additional guidance on managing tools and equipment used both inside and outside the home.

Author
Home & Garden Editorial Team
Home & Garden Editorial Team is the collective byline for our editorial team and contributor network. Articles published under this byline or an editorial pen name are researched, written, and reviewed according to our editorial standards for clarity, consistency, and independence before publication.
View all articles →